Resize your EC2 instances with minimal downtime
Table of Contents
Amazon Web Services (AWS) provides a really great service-oriented way of creating virtual machines in the cloud with their Elastic Cloud Compute (EC2) system. There’s many reasons you’d want to increase or decrease the size of an EC2 instance on AWS. Maybe you misjudged how much traffic you’d be getting, or maybe you need more horsepower to finish a certain workload in a shorter time.
Increased instance sizes on AWS of course come with a higher price tag, but depending on what you need them for, the increased performance could pay for itself.
So let’s say you chose an m3.small instance when setting up your first EC2 box and suddenly realized you need more horsepower and decide to increase to an m3.xlarge instance. Luckily AWS lets you do this with almost no downtime for your original box (it just needs to reboot once).
Create an AMI of your existing box #
To create a clone of an existing EC2 box, you need to first create an Amazon Machine Image (AMI) of it. These images allow for easy porting of a machine to other instance sizes, or maybe you just want to snapshot your machine in order to kill it and bring it back at a later time.
Right click your instance and choose “Create Image”.
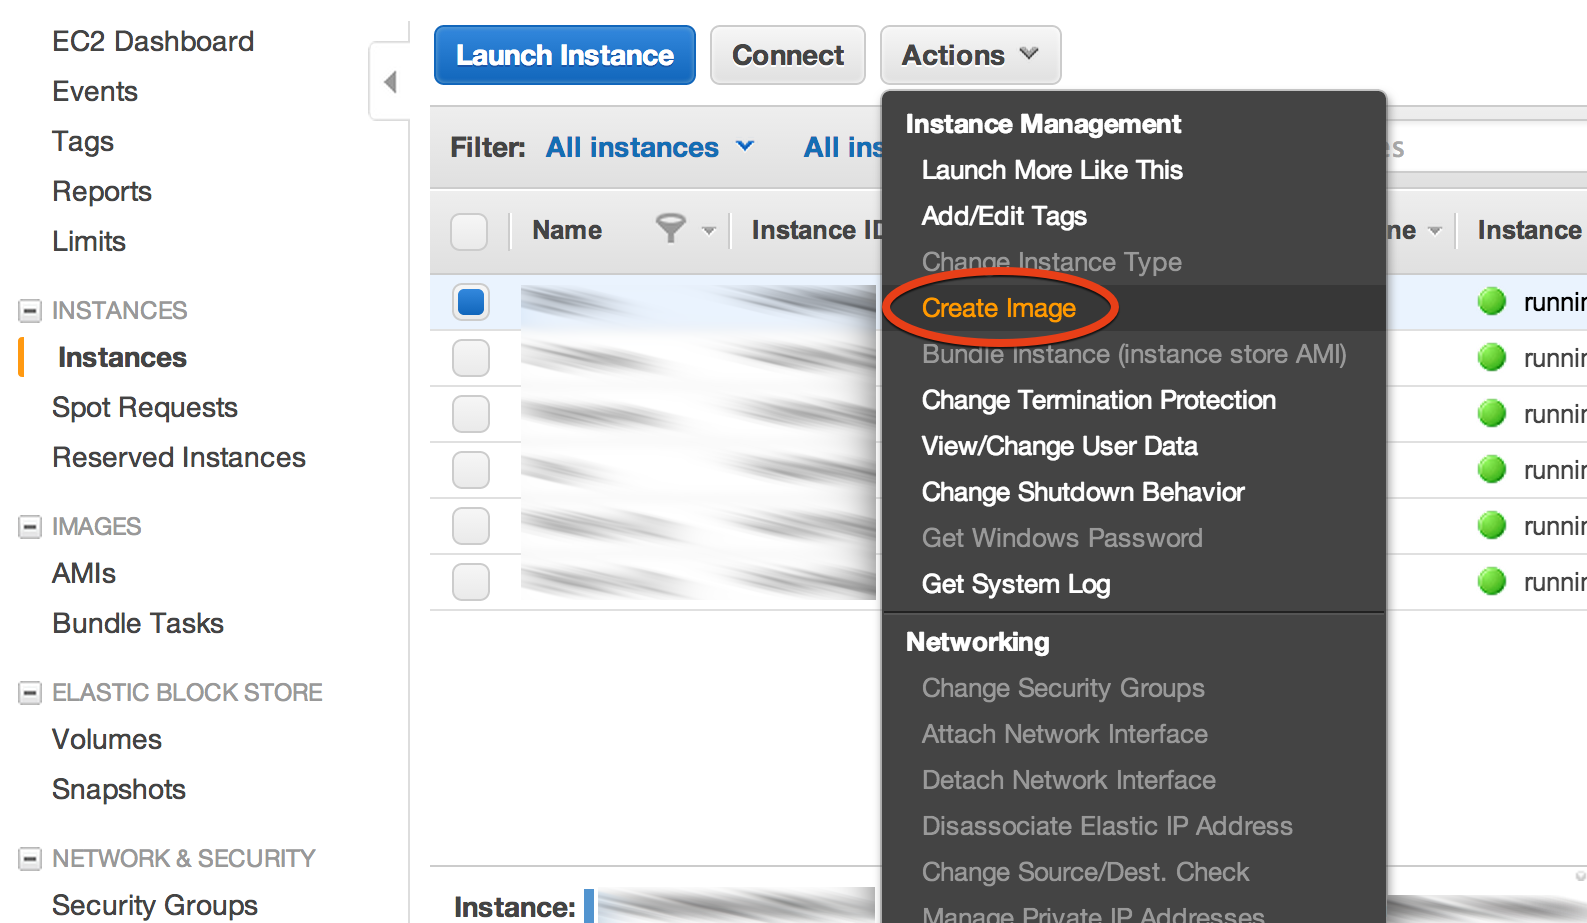
Amazon Machine Images (AMI) are snapshots of an entire EC2 machine
Give it a name #
After clicking Create Image, you will be presented with a dialog like the one pictured below. Enter a name and description that will allow you to remember what this AMI was for when you look it up in the future.
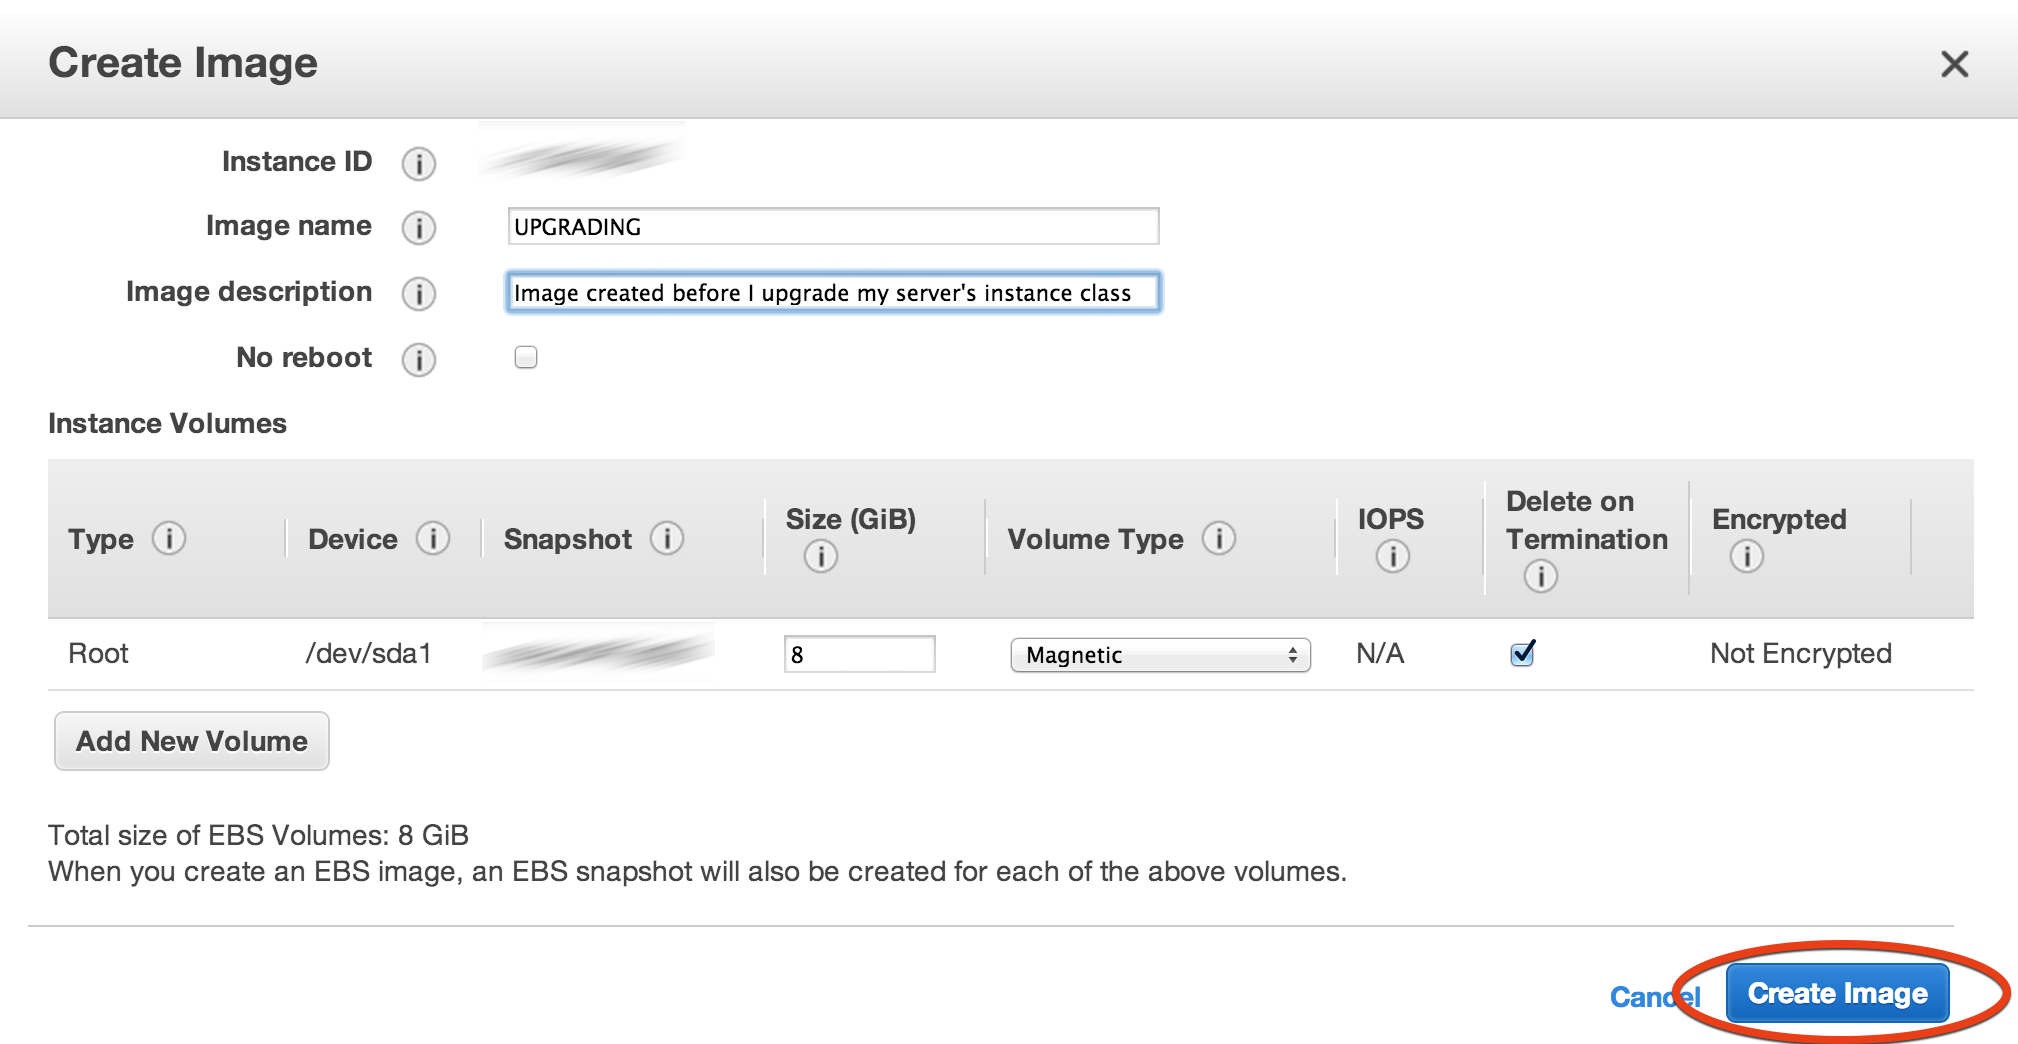
When you click the big blue “Create Image” button the process to create your image will start - this can take a few minutes, so go grab a coffee. One other important thing to note is that this action will cause your instance to reboot. You can check the “No Reboot” option, but here’s what Amazon has to say about that:
By default, Amazon EC2 shuts down the instance, takes snapshots of any attached volumes, creates and registers the AMI, and then reboots the instance. Select No reboot if you don’t want your instance to be shut down. Warning If you select No reboot, we can’t guarantee the file system integrity of the created image.
So it’s safer to allow AWS to reboot your EC2 instance in this situation if possible.
Launch your new resized instance #
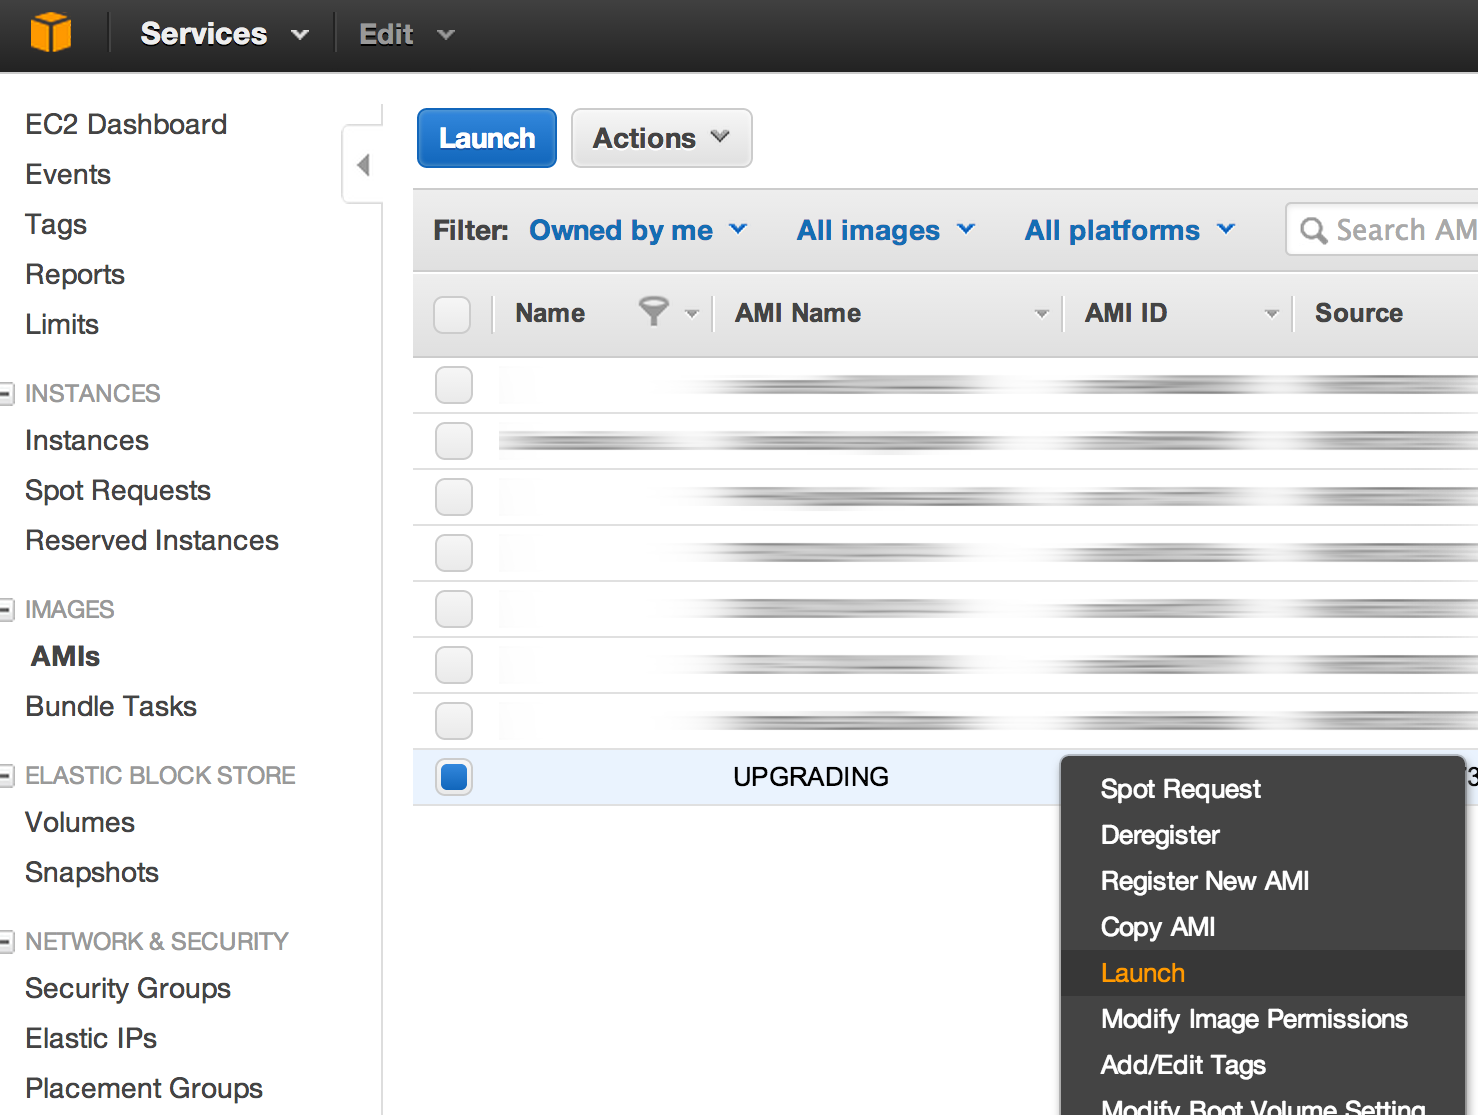
Once the AMI is created (you can check the progress on the “AMIs” screen), you can fire up your new instance with a few clicks. Navigate to the AMIs screen and right click your AMI and select “Launch”. At this point you’ll be taken through the normal instance creation process - this is where you would select your m3.xlarge instance in my example. You will also have the opportunity to add more storage and create a new keypair if you want (you can just reuse the keypair you used for your original instance if you want).
Once your new machine comes up, remember that it will have a different DNS name from your original box, so update any saved SSH/RDP connections you might have. After making sure that your shiny new instance is good to go, you can feel free to terminate your original box.
Bonus Points #
If you had your original instance tucked behind a load balancer with a twin instance (twinstance?), you could obviously have done this done this all with zero downtime, just perform this procedure on each of your instances one at a time, and add the new instances to the load balancing group with the old ones and eventually terminate the old ones.
Of course now that you have an AMI of your image, you could spin up as many of these in a many different instance classes as you like without the need for downtime.