I used the free Dynamic DNS (DDNS) service from Dyn since about 2006 and never had a single issue with it. That all changed when they phased out their free accounts. I was forced to find an alternative, so I went with No-IP.com which was easy to set up and provided a great service.
Recently, No-IP has been having some legal troubles that seem to be revolving around Microsoft’s crusade to rid the world of spammers/scammers/malware/botnets. My hostname was one of the ones that was nixed by Microsoft’s overly broad court order. I’m sure MSFT could have just worked with No-IPs abuse team and taken down only the offending domains - but I’m not going to get into rant about that.
So, I did what any self-respecting hacker does in this situation and decided to roll my own. I was already familiar with Amazon’s Route53 service so I figured why not? They have a nice REST API with granular access controls, as well as a command-line client that makes interacting with said API a breeze.
Step 1: Install awscli #
You can install the AWS command line client really easily using pip:
sudo pip install awscli
Note: if you don’t have pip installed, try:
sudo easy_install pip
Then retry the pip command. If you’re still having a hard time, just follow the official instructions here: http://docs.aws.amazon.com/cli/latest/userguide/cli-chap-getting-set-up.html.
Make sure you’ve got it installed properly by running aws --version. Next, you need to set up your access credentials using aws configure.
Step 2: Set up your hosted zone on Route53 #
This can be a bit complicated if you’re not familiar with the various ins and outs of DNS. The first step is to log into your AWS console and go to the Route53 service.
Next, create a new Hosted Zone by clicking “Create Hosted Zone”.
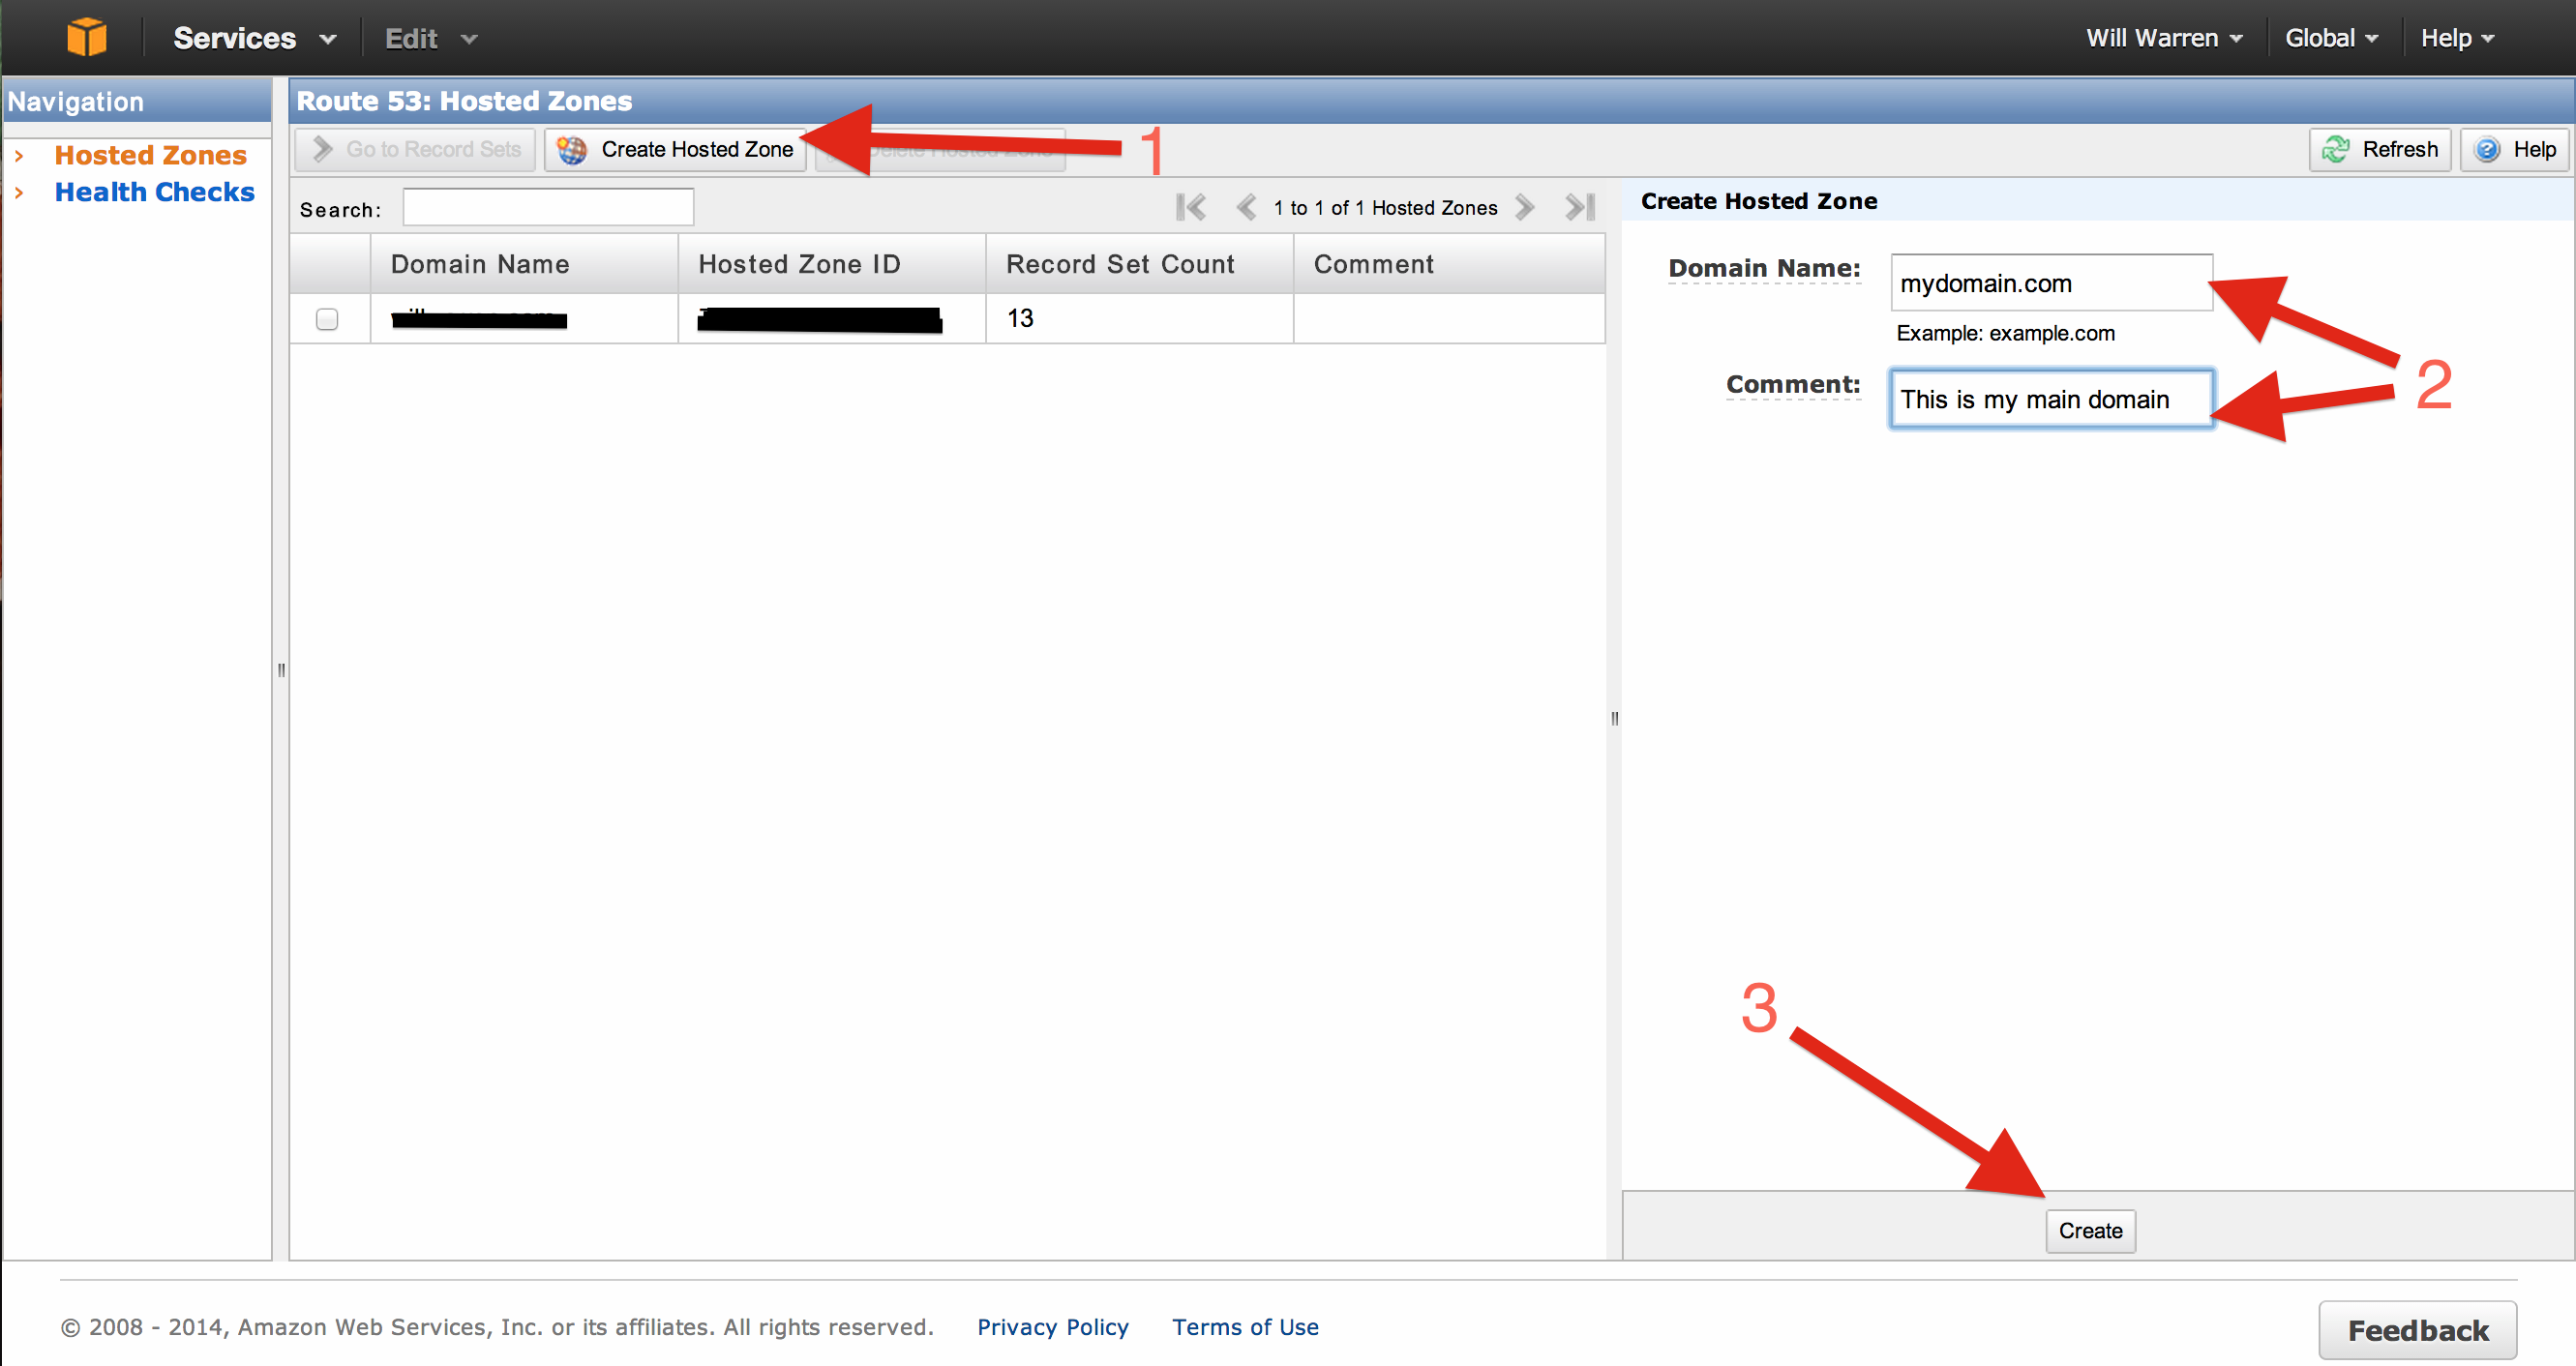
Once you’ve created the zone, select it in the list and you should see a list of properties show up on the right hand side. One of the properties is called Delegation Set - make note of these 4 addresses - you will need them once you’ve finished setting up all your DNS records.
Step 3: Populate your DNS records #
This step will vary from domain to domain depending on what you need. The fastest way is to use the Import Zone File button if your current DNS provider allows for easy exporting of your existing zone file (mine did not - urgh). If not, you’ll need to create them all manually.
Step 4: Update your Nameservers #
Your domain registrar should have somewhere in their admin panel that will allow you to change your nameserver records to point at your new Route53 nameservers instead.
You need to use the 4 addresses that were provided as your Delegation Set back up in Step 2.
Step 5: Use the BASH, Luke #
Now for the fun bit. Before anyone gives me grief for not coding my own REST client, I did this all in about an hour one evening and it works well. There are a number of different ways it could be accomplished. REST APIs are easily consumable by just about every programming language out there - I just decided to do a BASH script for the sake of time.
This script is designed to be run either manually as needed, or on a schedule using something like cron.
#!/bin/bash

# (optional) You might need to set your PATH variable at the top here
# depending on how you run this script
#PATH=/usr/local/sbin:/usr/local/bin:/usr/sbin:/usr/bin:/sbin:/bin

# Hosted Zone ID e.g. BJBK35SKMM9OE
ZONEID="enter zone id here"

# The CNAME you want to update e.g. hello.example.com
RECORDSET="enter cname here"

# More advanced options below
# The Time-To-Live of this recordset
TTL=300
# Change this if you want
COMMENT="Auto updating @ `date`"
# Change to AAAA if using an IPv6 address
TYPE="A"

# Get the external IP address from OpenDNS (more reliable than other providers)
IP=`dig +short myip.opendns.com @resolver1.opendns.com`

function valid_ip()
{
    local  ip=$1
    local  stat=1

    if [[ $ip =~ ^[0-9]{1,3}\.[0-9]{1,3}\.[0-9]{1,3}\.[0-9]{1,3}$ ]]; then
        OIFS=$IFS
        IFS='.'
        ip=($ip)
        IFS=$OIFS
        [[ ${ip[0]} -le 255 && ${ip[1]} -le 255 \
            && ${ip[2]} -le 255 && ${ip[3]} -le 255 ]]
        stat=$?
    fi
    return $stat
}

# Get current dir
# (from http://stackoverflow.com/a/246128/920350)
DIR="$( cd "$( dirname "${BASH_SOURCE[0]}" )" && pwd )"
LOGFILE="$DIR/update-route53.log"
IPFILE="$DIR/update-route53.ip"

if ! valid_ip $IP; then
    echo "Invalid IP address: $IP" >> "$LOGFILE"
    exit 1
fi

# Check if the IP has changed
if [ ! -f "$IPFILE" ]
    then
    touch "$IPFILE"
fi

if grep -Fxq "$IP" "$IPFILE"; then
    # code if found
    echo "IP is still $IP. Exiting" >> "$LOGFILE"
    exit 0
else
    echo "IP has changed to $IP" >> "$LOGFILE"
    # Fill a temp file with valid JSON
    TMPFILE=$(mktemp /tmp/temporary-file.XXXXXXXX)
    cat > ${TMPFILE} << EOF
    {
      "Comment":"$COMMENT",
      "Changes":[
        {
          "Action":"UPSERT",
          "ResourceRecordSet":{
            "ResourceRecords":[
              {
                "Value":"$IP"
              }
            ],
            "Name":"$RECORDSET",
            "Type":"$TYPE",
            "TTL":$TTL
          }
        }
      ]
    }
EOF

    # Update the Hosted Zone record
    aws route53 change-resource-record-sets \
        --hosted-zone-id $ZONEID \
        --change-batch file://"$TMPFILE" >> "$LOGFILE"
    echo "" >> "$LOGFILE"

    # Clean up
    rm $TMPFILE
fi

# All Done - cache the IP address for next time
echo "$IP" > "$IPFILE"
Update: Added several other options for the IP provider since they don’t always seem to be the most reliable.
I won’t go into explaining line by line what this does, but the gist of it is that it goes out to icanhazip.com to get the current IP address, makes sure it’s valid, compares it to the last one that it got, and if it changed then it updates the Route53 Record Set using the awscli tool. It logs to a file called update-route53.log every time it runs and stores the last IP it got in a file called update-route53.ip.
Feel free to poke fun at my BASH skills.
Optional Step 6: Set up your crontab #
To make this run every 30 minutes, I added this to my crontab (using crontab -e):
*/30 * * * * /home/will/scripts/update-route53.sh
How much does it cost? #
The Amazon Route53 Pricing Page does a pretty good job of explaining it - basically you’re looking at about $0.60 - $1.00/month depending on your site’s traffic.
Comments