Amazon just launched a new service called AWS Certificate Manager (ACM) as part of their ever growing suite of services. The new service allows for more or less one-click creation and deployment of free SSL certificates (yes, free). I used ACM to enable SSL on this very website and it didn’t cost me a dime. Anyone can set up SSL for their own custom domain name in no time at all with this new service.
ACM competes with the relatively well-known Let’s Encrypt in that it also allows anyone with a domain to create their own SSL certificate that can be used on - and is trusted by - almost all web browsers. Yes, you can pay no money and still get the “little green padlock” that makes everyone feel safer on the web.
Prerequisites #
In order to actually do this all in just a couple of clicks, you need to already have a few things in place. Namely:
- Your static website is hosted on Amazon S3
- You already have a CloudFront distribution caching your website
Both of these things are pretty easy to set up and I will cover them in future blog posts. For now, check out this article for setting up an S3 static website and this article for enabling CloudFront.
Once you’ve done that, come right back - I’ll wait…
Enabling ACM #
Navigate to the Certificate Manager area under the Services menu in the AWS control panel. Next, click the big blue Request a certificate button in the upper left corner to kick off the process.
Be sure to enter your www.domain.com as well as your domain.com in the next screen:
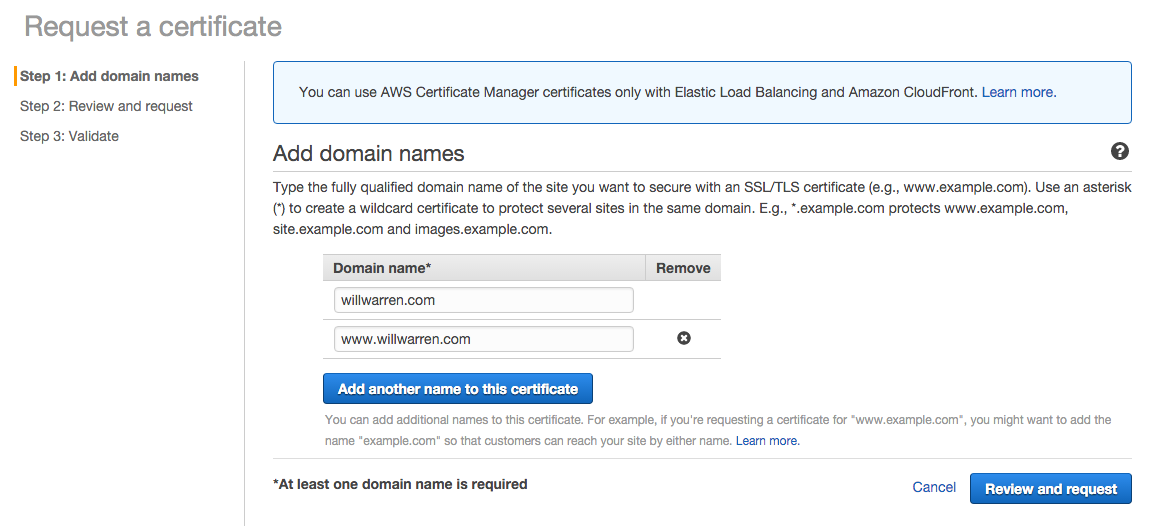
After clicking Review and request, you’ll be asked to confirm that yes, you really want to request this new certificate.
Get an Email #
AWS will send an email to all email addresses listed in the WHOIS information for your website, as well as all the standard domain verification addresses (admin@domain.com, webmaster@domain.com etc.) so be sure you can fetch email messages for one of the addresses it lists for you.
After you click the confirmation link in the Email, you are almost done!
Link the SSL certificate to your CloudFront distribution #
Open up your CloudFront distribution by clicking on its ID. Next, click the “Edit” button on the “General” tab.
Select Custom SSL Certificate in the SSL Certificate section. You will then be able to select your ACM SSL certificate from the dropdown.
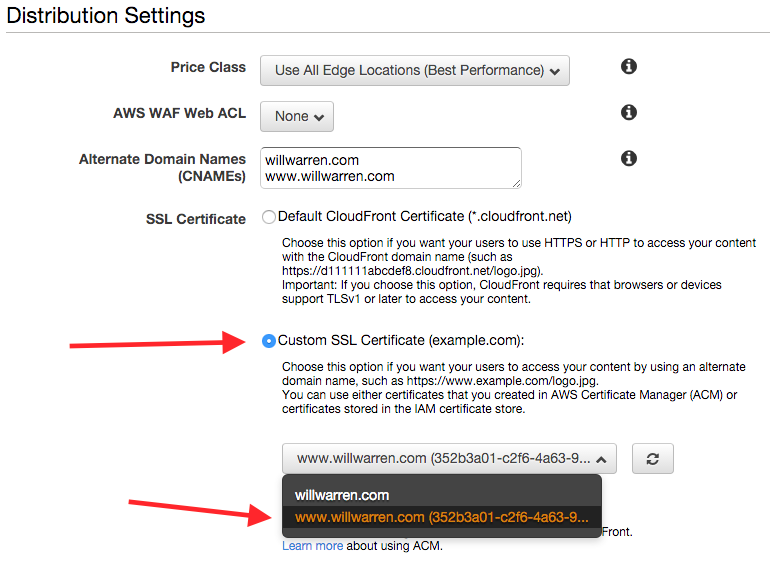
Once you select your SSL certificate and click Yes, edit at the bottom of the screen you are done!
Note: it can take some time for the SSL to actually switch over. For my site, it took about an hour.
OK fine, so it wasn’t exactly one click…but compared to the current state of affairs when it comes to provisioning and deploying custom SSL certificates this was a cinch.
Links #
For some more information about AWS Certificate Manager, visit the ACM FAQ page here: https://aws.amazon.com/certificate-manager/faqs/.
For some general info about SSL with CloudFront, take a look over this page: http://docs.aws.amazon.com/AmazonCloudFront/latest/DeveloperGuide/SecureConnections.html#CNAMEsAndHTTPS
Comments